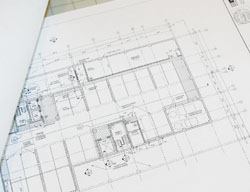
So where do you start if you have little or no experience looking at drawings? Let’s begin with the typical organization of plans. Plans are broken into types based on the kind of work that is being conveyed.
The cover sheet or title page usually includes the index of drawings, a pictorial image, site location, names of companies involved, lists of symbols, and materials legend.
- C – Civil drawings; anything related to the exterior of the building
- A – Architectural drawings; plans, elevations, sections, finish schedules, and details
- S – Structural drawings; foundations, reinforcing steel, structural steel, plans sections, and details
- M – Mechanical
- P – Plumbing
- M – HVAC
- E – Electrical
Example: A.10.1 – architectural drawing, sheet 10.1; P3.7 – plumbing drawing, sheet 3.7. This is why understanding the cover/title sheet is so important.
Note that not all architects and engineers use the letter-number system.
Before computers, draftsmen drew buildings by hand with a T-square and triangle. However, the means of creating drawings has changed. The initial CAD (computer-aided design) drawings are full-scale building drawings done by the architect.
Currently, architects use BIM (building information modeling) which includes every piece of information about the building in three dimensions. BIM is capable of coordinating all of the architectural, structural, mechanical, plumbing, and electrical plans.
When you pick up a set of drawings, follow these steps:
- Review the cover/title sheet.
- Flip through the drawings page by page.
- Tag pages with information related to your scope of work.
- Highlight areas pertaining to your scope of work.
- Read the specifications.
Keep it in perspective
Although drawings are created in full scale on the computer, they obviously can’t be printed on sheets of paper in full size. They are reduced to an appropriate scale which includes the information that is being conveyed to fit the paper size.
There are two basic scales used in the construction industry: an architect’s scale and an engineer’s scale. The architect’s scale is typically used for the interior of the building, displaying plans, sections, and details. The engineer’s scale is typically used for the exterior of building.
An architect’s scale uses fractions of an inch related to a foot. For example, ¼ inch = 1 foot or ¾ inch = 1 foot means that each actual ¼ or ¾ inch in scale equals 1 foot in full scale.
An engineer’s scale relates an inch to a number of feet. For example, 1 inch = 20 feet or 1 inch = 50 feet means that each inch in scale equals 20 or 50 feet in full scale. There is not enough space here to provide a full explanation of using scales. But to retrieve dimensional information from a set of drawings, it is important to understand the scale of a drawing and the use of these instruments.
Dan Dorfmueller is an instructor and consultant for the construction industry, with more than 40 years of experience. He is the author of Print Reading for Construction. You can buy the book atwww.printreading.us.
Visit www.printreading.us to download a short PDF on the use of scales.
Read Part 2 of this series: “Specifications: What’s in it for me?”


